Introduction to How to Make Lacquer Paintings
Learning how to make lacquer paintings is a fascinating journey that blends creativity with Vietnam’s traditional techniques. Lacquer paintings, known for their enduring beauty and unique depth, have become a cultural symbol recognized worldwide. From the masterpieces of Nguyễn Gia Trí to contemporary works, lacquer painting requires precision and patience. In this guide, we’ll walk you through the step-by-step process of creating lacquer paintings, from preparing tools and selecting materials to mastering the lacquer painting process. Whether you’re a beginner or an artist exploring this art form, this article will equip you with essential techniques.
Discover more about this art form at the Vietnam art gallery.
What Are Lacquer Paintings and Why Are They Special?
What Makes Traditional Lacquer Paintings Unique?
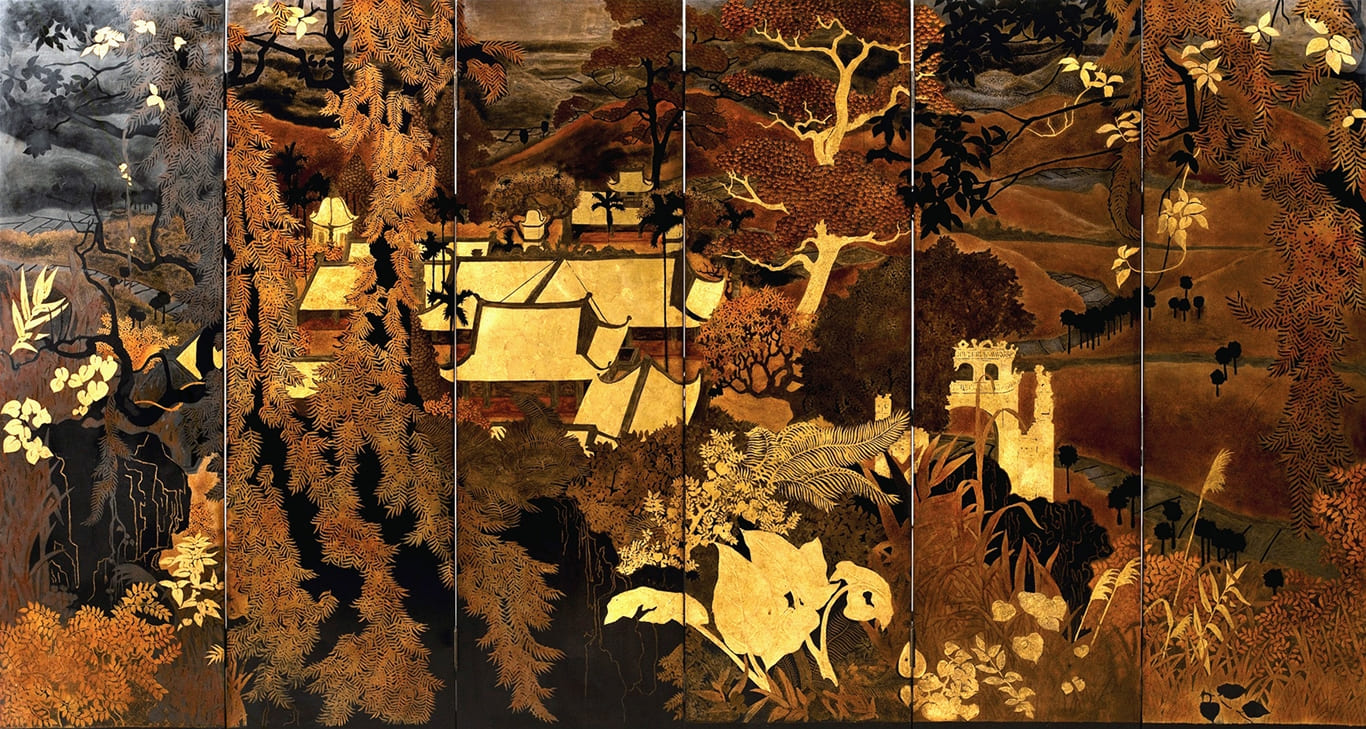
Traditional lacquer painting is a distinctive Vietnamese art form that emerged in the 20th century, blending ancient lacquer techniques with modern painting. Its uniqueness lies in:
- Natural Materials: Using lacquer sap, gold, silver, mother-of-pearl, and other natural elements to create light effects and depth.
- Timeless Durability: The layering and polishing process ensures colors remain vibrant for decades.
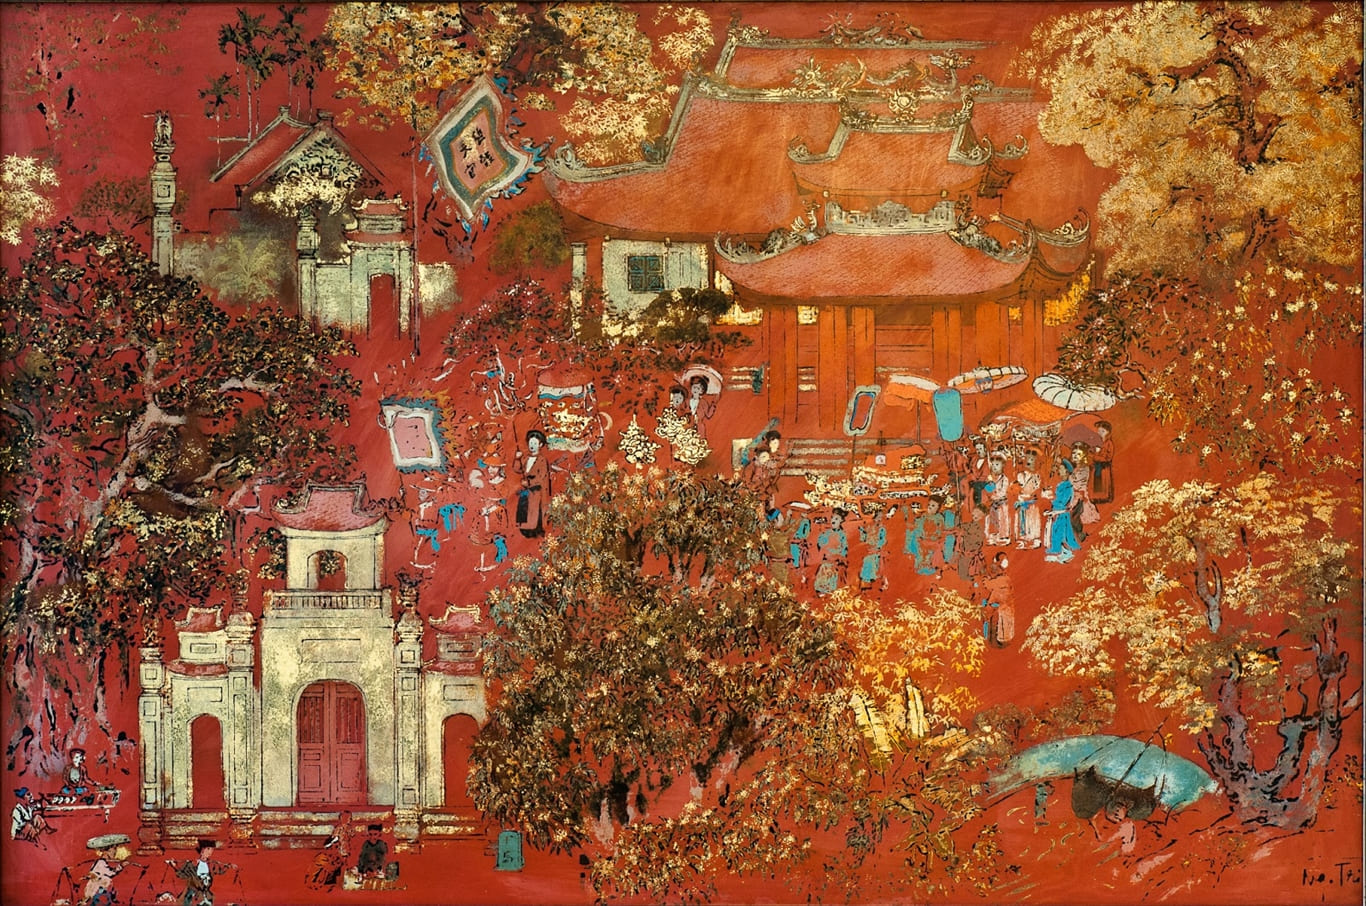
- High Artistic Value: Combining intricate techniques with creative expression, as seen in works by Tô Ngọc Vân and Nguyễn Gia Trí.
Why Learn How to Make Lacquer Paintings?
Mastering lacquer painting not only sparks creativity but also connects you to Vietnam’s rich cultural heritage. According to Thanh Niên, lacquer painting is a UNESCO-recognized art form, captivating millions at global exhibitions. Learning this craft allows you to:
- Explore traditional handmade techniques.
- Create unique artworks at home.
- Deepen your appreciation for the cultural and historical value of lacquer paintings.
Tools Needed for Lacquer Painting
What Tools Are Essential for Lacquer Painting?
To start the lacquer painting process, gather these essential tools:
- Sandpaper: Both dry and wet sandpaper (400-1200 grit) for smoothing wood and refining surfaces.
- Spatulas: Straight and angled spatulas for evenly applying lacquer.
- Detailing and Silver Brushes: For precise detailing and applying gold or silver leaf.
- Knife, Hammer, Muslin Cloth: For preparing the wooden base and creating the foundation.
- Grinding Stone: For final surface smoothing.
- Water Bucket, Clean Cloth: For wet sanding and cleaning.
How to Choose the Right Tools?
- Quality: Select sandpaper with varying grits for different stages of sanding.
- Material-Specific Tools: Use specialized silver brushes for silver leaf; opt for soft brushes for Japanese lacquer.
- Sourcing: Purchase from art supply stores or traditional markets like Tương Bình Hiệp lacquer village in Bình Dương.
Materials for Lacquer Painting
What Are the Common Materials for Lacquer Painting?
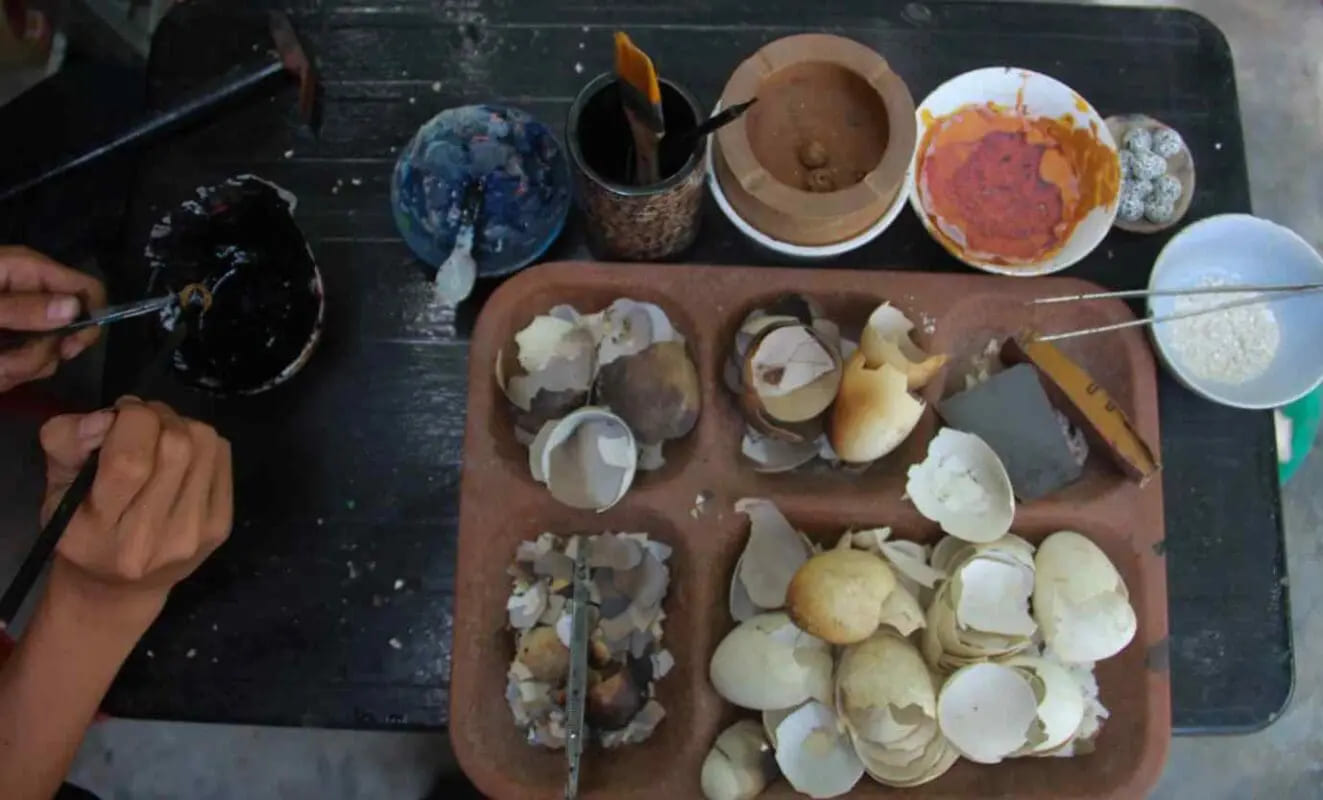
The materials used in lacquer painting are critical to its beauty and value. Key materials include:
- Lacquer Sap (Sơn Ta): Milky sap from lacquer trees, used as a binder for gloss and durability.
- Japanese Lacquer (Alternative): Less toxic and easier for beginners to use.
- Gold/Silver Leaf: For metallic effects, available in sheets or powdered form.
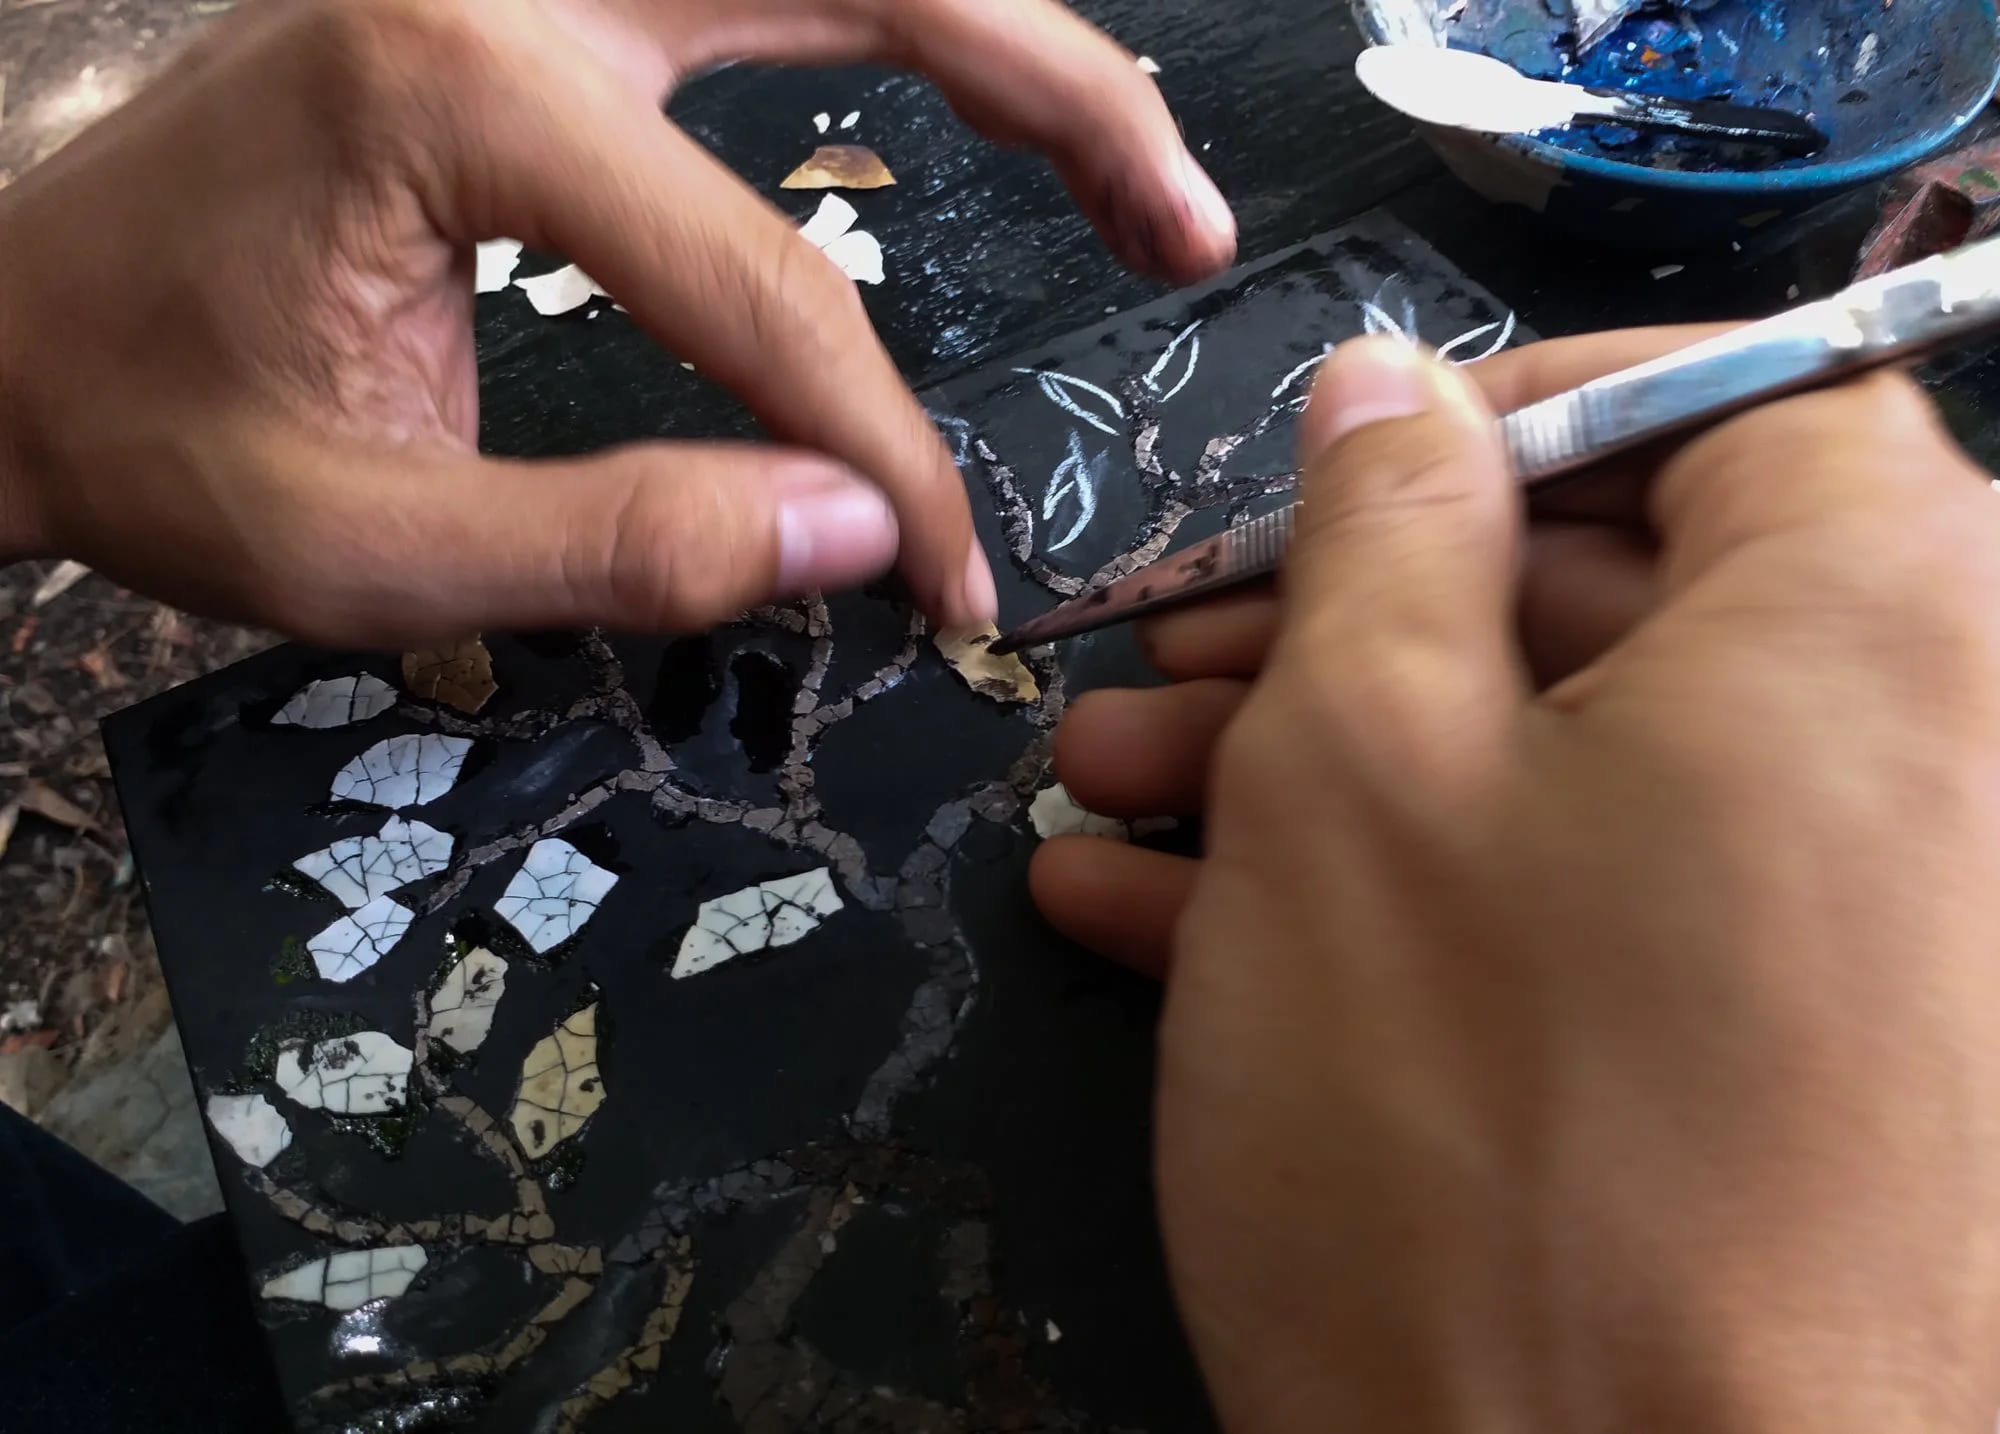
- Mother-of-Pearl, Eggshells, Seashells: For texture and depth.
- Mineral Pigments: Black and red ochre for vibrant, fade-resistant colors.
- Castor Oil, Dó Resin: Enhances adhesion and gloss.
How to Choose Quality Materials?
- Natural Sourcing: Lacquer sap from Phú Thọ or Quảng Nam is top-quality, per VnExpress.
- Purity Check: Ensure gold/silver leaf is thin and free of impurities.
- Test First: Experiment with small samples to check lacquer and material reactions before applying to the artwork.
Step-by-Step Lacquer Painting Process
What Are the Basic Steps to Make a Lacquer Painting?
The lacquer painting process requires meticulous attention across multiple stages, from preparing the base to finishing the artwork. Here’s a detailed guide:
Step 1: Preparing the Base (Vóc)
The base, or vóc, is the foundation of a lacquer painting, determining its durability and quality. Steps include:
- Wood Selection: Use oak, plywood, or bamboo, treated to prevent warping.
- Filling Cracks: Apply a mix of raw lacquer and sawdust to seal cracks.
- Priming: Brush on diluted raw lacquer to protect against moisture.
- Cloth Layering: Cover with muslin cloth and raw lacquer for added strength.
- Base Coating: Mix clay, sawdust, and raw lacquer, then spread evenly.
- Smoothing: Apply river silt mixed with raw lacquer, repeating 3-5 times for a flat surface.
- Undercoating: Apply raw lacquer and wet-sand for a smooth finish.
- Final Filling: Use diluted lacquer to fill tiny holes.
- Base Coloring: Apply mature lacquer (black or red ochre) for the background.
- Final Sanding: Wet-sand with fine sandpaper for a flawless surface.
Time: 20-30 days to complete a high-quality base.
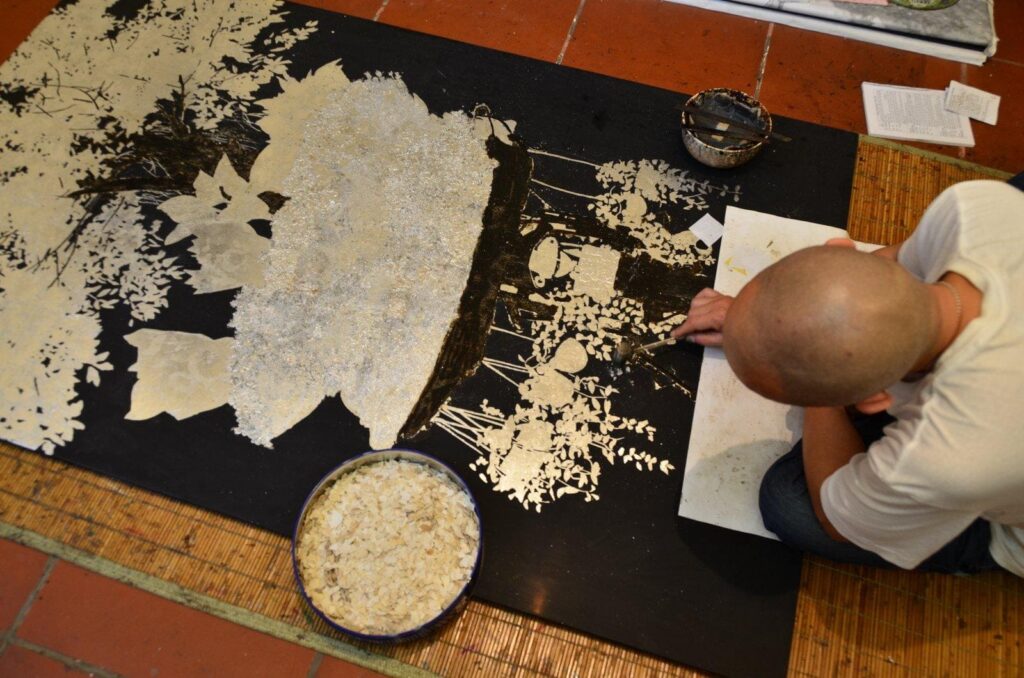
Step 2: Painting and Detailing
Once the base is ready, the creative process begins:
- Sketching: Draw the composition with white chalk on the base.
- Base Coloring: Apply mature lacquer, gold, silver, or mother-of-pearl for the foundation.
- Detailing: Use fine brushes to add intricate details and metallic effects.
- Protective Layer: Brush on red ochre lacquer mixed with kerosene to preserve colors.
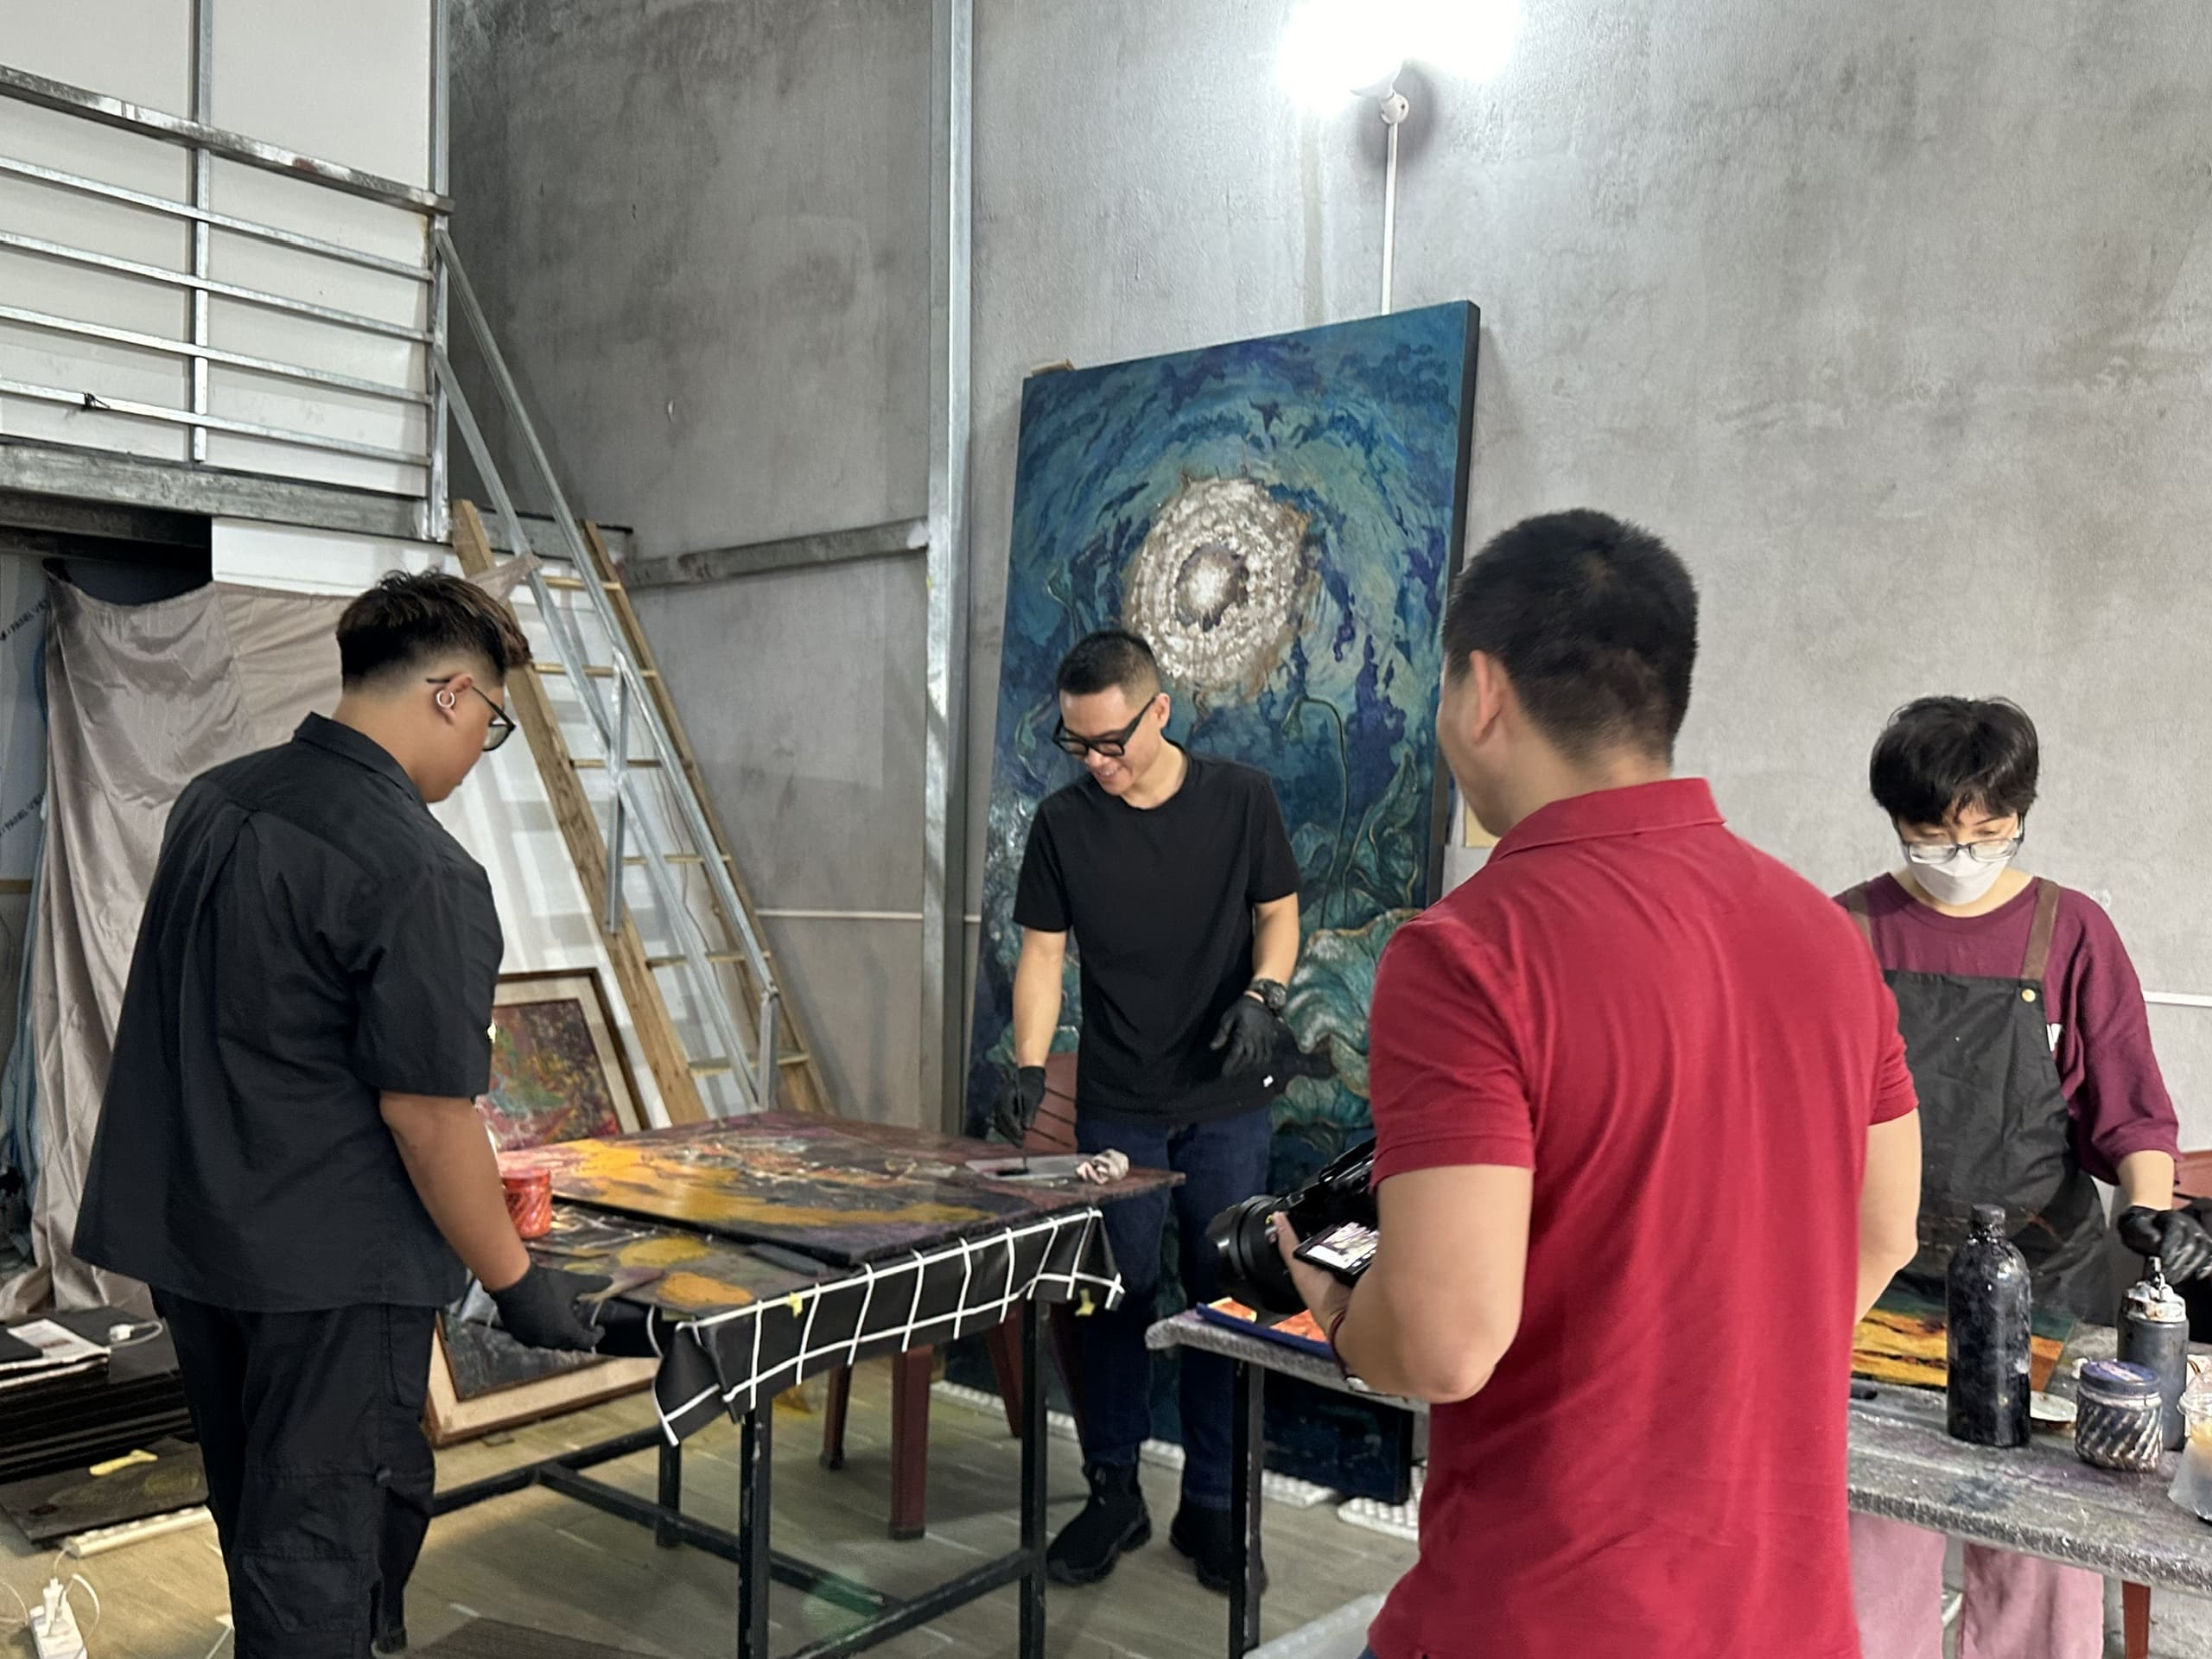
Step 3: Sanding and Finishing
Sanding is the key step that creates depth and polish:
- Layer Sanding: Wet-sand each lacquer layer to reveal underlying colors and materials.
- Depth Control: Sand gently to avoid damaging the main layers.
- Polishing: Rub with the palm or tangled hair for a mirror-like finish.
- Final Coating: Apply a thin lacquer layer for durability.
Time: 4-6 months, or even years for complex pieces.
Tips for Successful Lacquer Painting
- Patience: Allow 3-5 days for each lacquer layer to dry.
- Tool Maintenance: Keep sandpaper and brushes clean to avoid scratches.
- Small Tests: Practice on small wood pieces before working on the main base.
- Material Storage: Seal lacquer sap tightly to prevent spoilage.
Tips for Making Lacquer Paintings at Home
How to Create Lacquer Paintings at Home?
Beginners can try a simplified lacquer painting process at home:
- Use Japanese Lacquer: Less toxic and easier to source from art stores.
- Small Base: Start with a 20x30cm wood panel for easy handling.
- Learn from Videos: Watch YouTube tutorials to master sanding and detailing.
Common Mistakes and How to Fix Them
- Uneven Lacquer: Apply lacquer smoothly with a spatula.
- Scratched Surface: Re-sand with fine sandpaper (1200 grit) and reapply lacquer.
- Fading Colors: Use high-quality mature lacquer to prevent fading.
Cultural Value of Traditional Lacquer Paintings
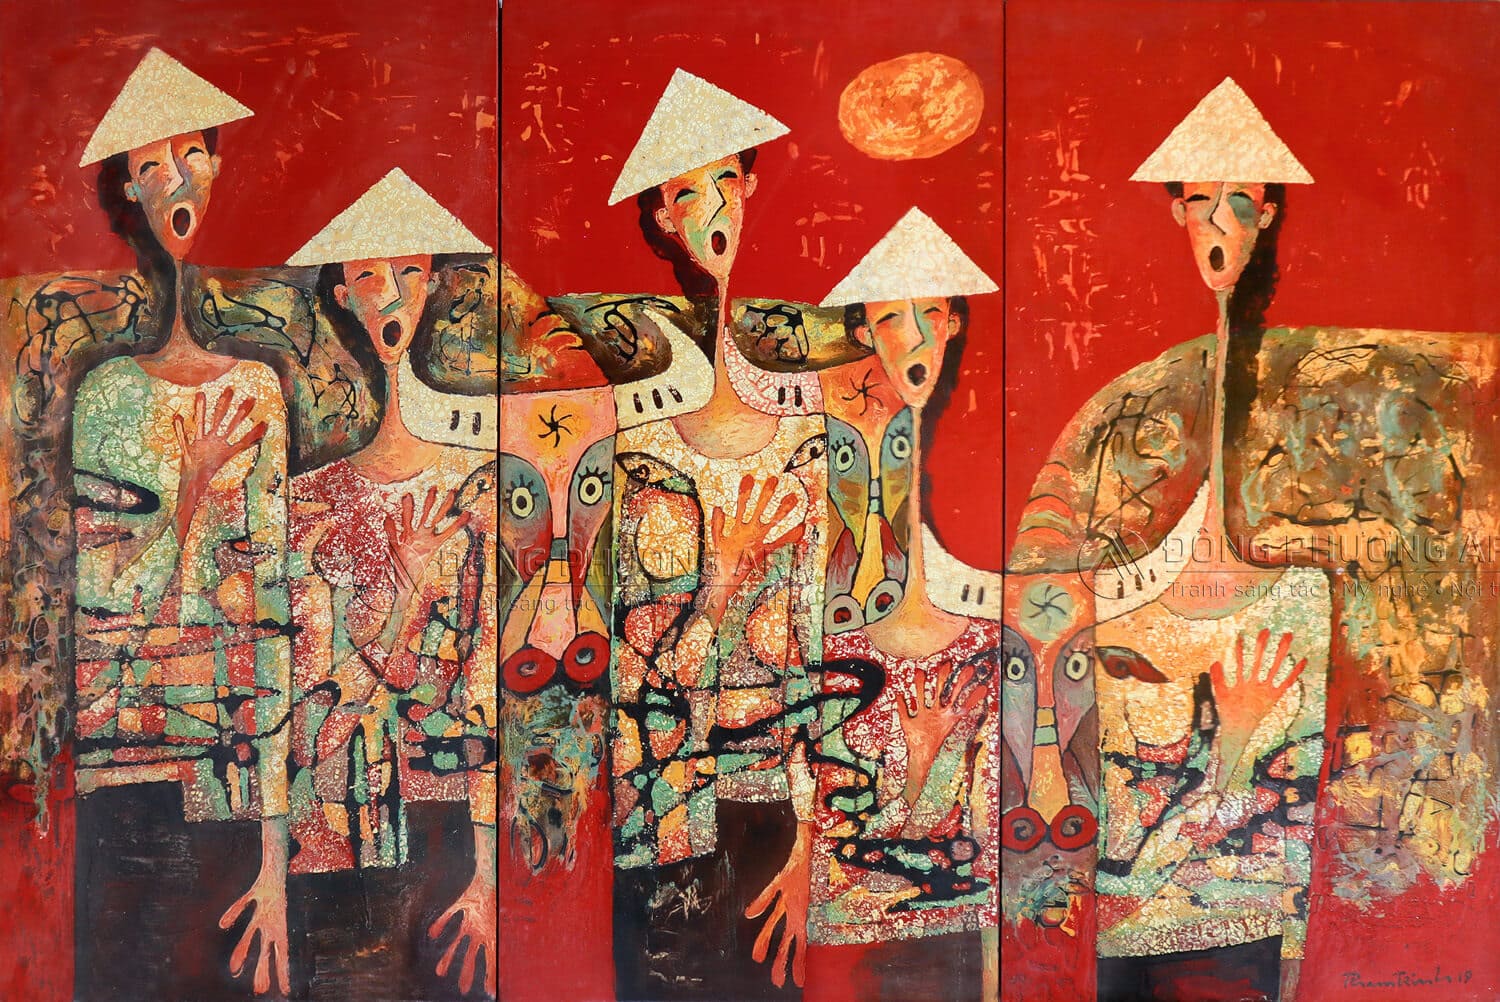
Why Are Lacquer Paintings a Cultural Heritage?
Lacquer paintings are not just art but a cornerstone of Vietnamese heritage. According to VnExpress, works by artists like Nguyễn Gia Trí fetch millions at auctions, reflecting their artistic and historical value. They:
- Showcase Vietnam’s unique craftsmanship.
- Connect generations through traditional villages like Tương Bình Hiệp.
- Inspire contemporary global art.
How to Preserve Lacquer Paintings?
- Learn and Practice: Join workshops at lacquer villages or art schools.
- Proper Display: Avoid direct sunlight and high humidity to protect artworks.
- Spread Awareness: Share knowledge about lacquer painting through blogs, videos, or social media.
Start Your Lacquer Painting Journey
Mastering how to make lacquer paintings requires patience, skill, and passion, but the result is a stunning, durable artwork steeped in Vietnamese culture. From preparing tools and selecting materials to executing the lacquer painting process, you can create your own masterpiece. Start today with a small project, explore tutorials, or visit lacquer villages to learn from artisans.
Next Steps
- Purchase tools and materials from art supply stores.
- Watch YouTube tutorials on the lacquer painting process.
- Share this article to spread the art of lacquer painting with friends!